
View Camera Details
-
Log in to the Virtual Keypad app and enter your User Code.
-
Select the

-
Select the
-
In Camera Details, select > to view the following information:
-
Name
-
MAC Address
-
Serial Number
-
Last Check-In
-
Wireless Signal Strength
-
Delete a Region or Line
-
Log in to the Virtual Keypad app and enter your User Code.
-
Select the
-
Select the
-
In Set Up Regions, select >.
-
Select the colored box with the number of the region or line you want to delete, then select
Delete Region or Delete Line. -
Select Save at the top of the screen.
Edit Camera Display Page
Adjust Camera Layout
You can display your cameras in a list or grid view. Complete the steps below:
-
Log in to the Virtual Keypad app and enter your User Code.
-
Select the
-
Select one of the following icons at the top of the screen:
-

-

-
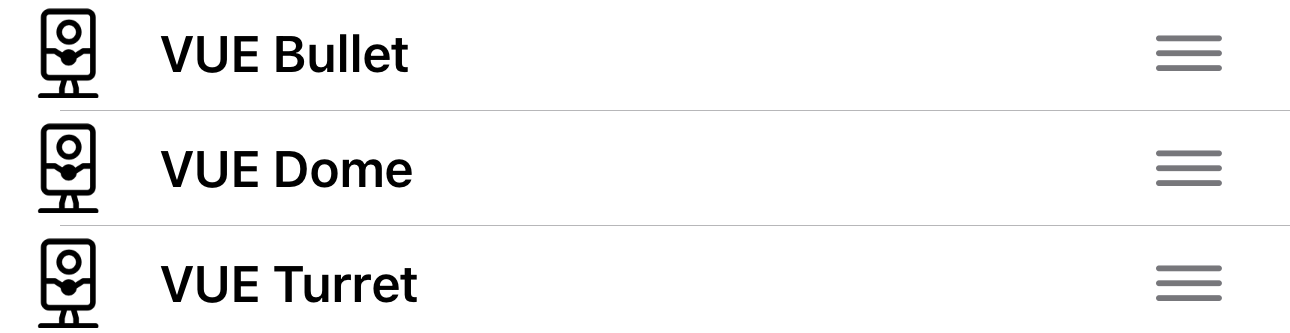
Reorder Cameras
You can reorder how cameras appear in the camera display page. Complete the steps below:
-
Log in to the Virtual Keypad app and enter your User Code.
-
Select the
-
Select the

-
Drag the cameras to reorder them.
-
Select < Back to view the newly reordered cameras.
Filter Camera Clips
-
Log in to the Virtual Keypad app and enter your User Code.
-
Select the
-
At the top of the screen, select the

-
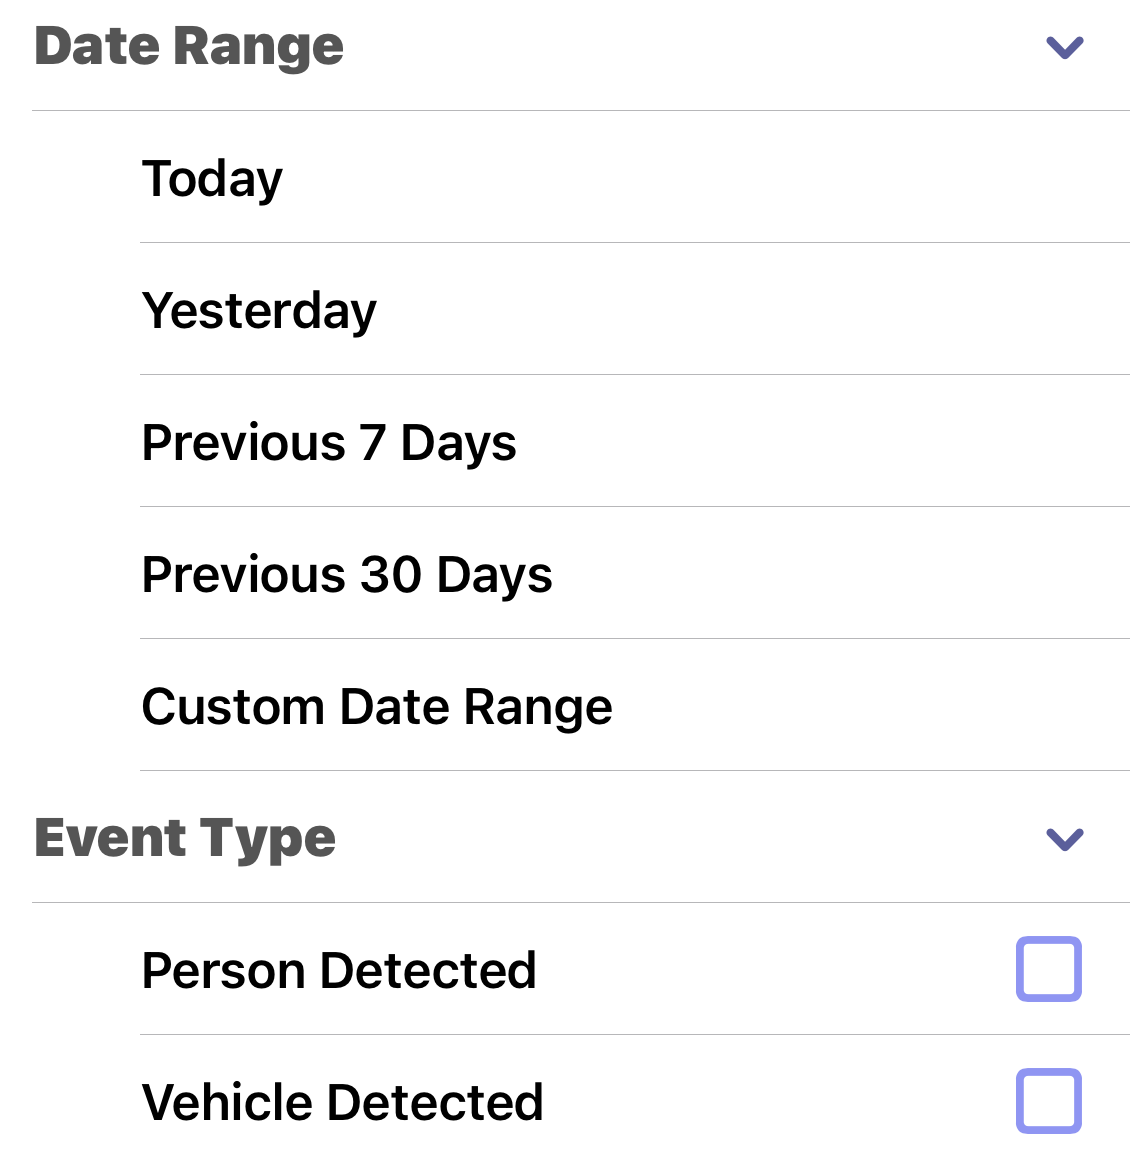
In Date Range select one of the following options to filter event clips by the date:
-
Today
-
Yesterday
-
Previous 7 Days
-
Previous 30 Days
-
Custom Date Range
-
-
If video analytics are enabled, in Event Type, select the checkbox for any of the following options to filter event clips by analytic detections:
-
Person Detected
-
Vehicle Detected
-
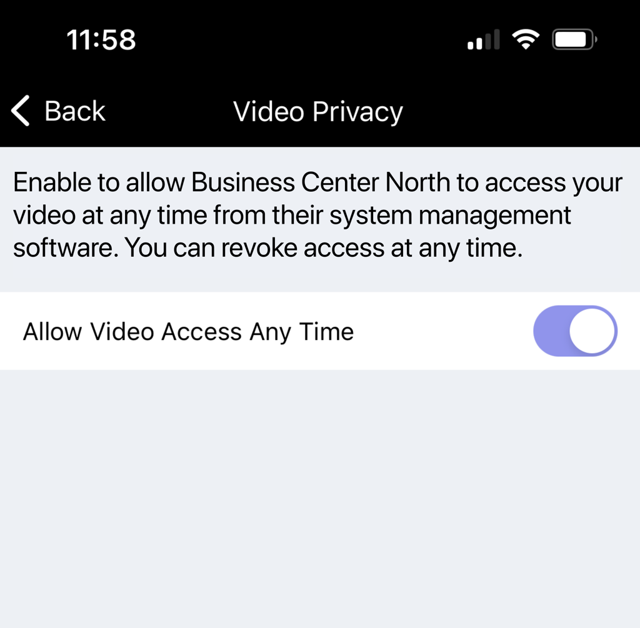
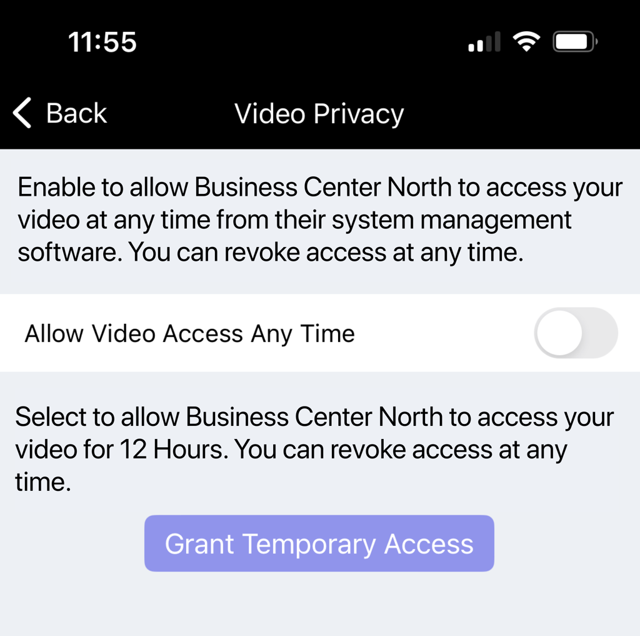
Enable Video Access to Technicians and Dealers
Note: All cameras brought online are immediately granted access to the video feed for 12 hours.
In Virtual Keypad, you can choose to allow video access to technicians and dealers. When video access is enabled, all Administrator level app users receive a notification email. To enable video access, follow the steps below:
-
Log in to the Virtual Keypad app and enter your User Code.
-
Select the

-
Toggle Allow Video Access Any Time ON to grant technicians and dealers unlimited access to the video feed. If Allow Video Access Any Time is toggled OFF, you can enable Grant Temporary Access to allow technicians and dealers access to video for 12 hours. Access can be revoked instantly by selecting Revoke Access or disabling All Video Access Any Time.
Enable Push Notifications
Note: Ensure regions and lines have been set up to receive push notifications for analytic detection events.
Subscribe to push notifications on your camera for online, offline, and defined regions and lines.
-
Go to the Virtual Keypad app, then enter your User Code.
-
Select the
-
Go to Push Notifications, then select Cameras.
-
Push notifications are enabled by default. Toggle Push Notifications OFF to disable push notifications.
-
If Push Notifications are enabled, select the toggle Person or Vehicle ON to be notified when those detections occur.
-
Select Save in the top-right corner. You will receive a push notification any time there is a camera detection.