View Camera Details
-
Log in to Dealer Admin (dealer.securecomwireless.com).
-
Go to Customers and select the System Name the camera is associated with.
-
At Video, go to Cameras and select the camera.
-
At the top of the screen, select Camera Details to view the following information:
-
Camera Id
-
Camera Name
-
MAC Address
-
IP Address
-
Serial Number
-
Activation Status
-
Time Zone
-
Daylight Saving Time
-
Last Check In
-
Firmware Version
-
User Name
-
Password
-
Update the Camera Firmware
The camera automatically updates to the newest firmware version when it is first activated on Dealer Admin. After the camera has been activated, you can manually update the camera firmware if an update is available. To update the camera firmware, complete the following steps:
-
Log in to Dealer Admin (dealer.securecomwireless.com).
-
Go to Customers and select the System Name the camera is associated with.
-
At Video, go to Cameras and select the VUE camera you want to update.
-
At the top of the camera settings page, a banner displays notifying you that a firmware update is available. Select Update Device to update the camera firmware.

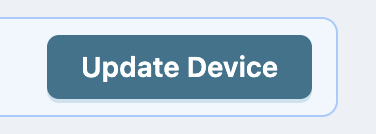
Note: The update process can take up to 15 minutes. Leave the camera powered and connected to network.
Reset the Camera
Complete the following steps to reset the camera to its default factory settings:
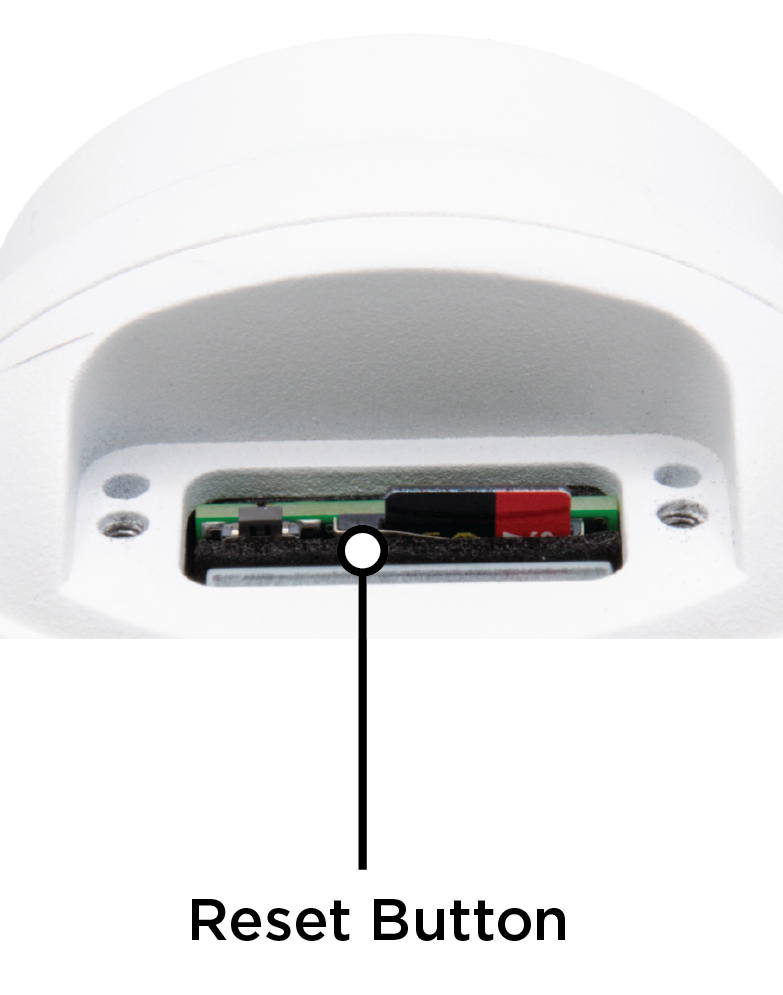
VUE Turret
-
Remove the screws from the SD card slot cover on the back of the camera.
-
Locate the reset button.
-
While the camera is still powered up, press and hold the button for 20 seconds to reset the camera to its default factory settings.
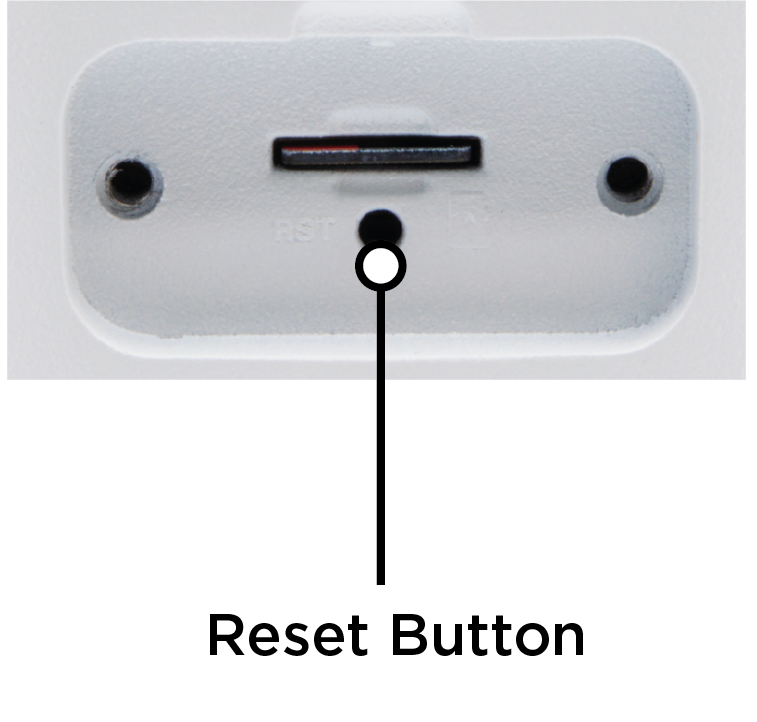
VUE Bullet
-
Remove the screws from the SD card slot cover on the back of the camera.
-
Locate the RST (reset) button.
-
While the camera is still powered up, press and hold the button for 20 seconds to reset the camera to its default factory settings.
VUE Dome
-
Find the cable connected to the camera with a protective cap.
-
Open the cap to access the reset button.
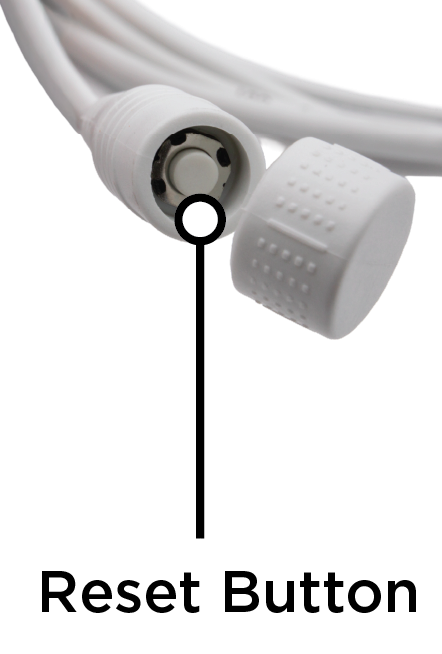
-
While the camera is still powered up, press and hold the button for 20 seconds to reset the camera to the default factory settings.
Enable Monitoring Center Video Verification
-
Log in to Dealer Admin (dealer.securewireless.com).
-
Go to Customers and select the System Name the camera is associated with.
-
In System Information, select Edit at the top of the screen.
-
Scroll down to Video. Toggle Monitoring Center Video Verification ON to enable video verification.
-
Select Save at the top or bottom of the screen.
Delete a Region or Line
-
Log in to Dealer Admin (dealer.securecomwireless.com).
-
Go to Customers and select the System Name the camera is associated with.
-
At Video, go to Cameras and select the camera with the region or line you want to delete.
-
Find the region or line, then select the

-
Select Save at the top of the screen.
Delete a Camera
-
Log in to Dealer Admin (dealer.securecomwireless.com).
-
Go to Customers and select the System Name the camera is associated with.
-
At Video, go to Cameras and select the camera you want to delete.
-
Select Delete at the top of the screen.
-
A pop up displays to confirm you want to delete the camera. Select Yes to delete the camera.
Add a Camera to the XVGateway with AlarmVision®
To add a camera to the XV Gateway, refer to XV Gateway with AlarmVision® Help: Add Devices to the XV Gateway.