Note: Ensure the video camera has been activated on Dealer Admin before using Virtual Keypad. For more information, refer to Dealer and Installer Guide.
The camera includes the following features:
-
5MP resolution
-
Person and vehicle analytics
-
Red and blue/white deterrence lighting
-
Built-in microphone
-
Built-in speaker
To use the VUE Turret camera, complete the steps below:
Configure Camera Settings
Note: For best user experience, when viewing video on the 8860 7-inch Touchscreen Keypad, use the Medium setting for the Video Quality.
-
Log in to VirtualKeypad.com and enter your User Code.
-
In the menu, select Video.
-
Select the VUE camera you want to configure settings for.
-
Select the

-
Enter a Camera Name.
-
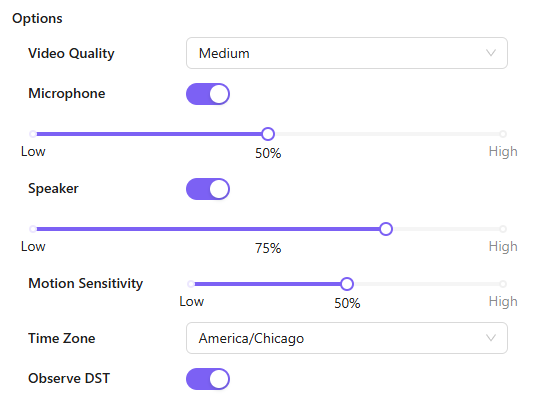
In Options, configure the following settings:
-
In Video Quality, select Low, Medium, or High to determine the video quality.
-
Microphone is toggled ON by default. Toggle OFF to disable the microphone.
-
Use the slider to adjust the microphone volume level.
-
Speaker is toggled ON by default. Toggle OFF to disable the speaker.
-
Use the slider to adjust the speaker volume level.
-
In Motion Sensitivity, use the slider to adjust how sensitive motion detection is. If Video Analytics are enabled, sensitivity is adjusted per region and does appear under Options.
-
Select the Time Zone.
-
Observe DST is toggled ON by default. Toggle OFF if you do not want to observe Daylight Saving Time.
-
-
Complete one of the following options:
-
Complete the steps below to create a region or line.
-
Select Save at the top of the screen.
-
Create a Detection Region
You can create up to 4 detection regions per camera and a total of 8 regions and lines per camera.
-
Log in to VirtualKeypad.com and enter your User Code.
-
In the menu, select Video.
-
Select the VUE camera you want to create a region for.
-
Select the
-
At Regions & Analytics, select + Region. A blue box appears in the middle of the camera view screen.

-
Select the box, then drag it across the camera view to place it in the desired location. Select and move the white circles on the corners of the box to manipulate the region.
.png.jpg?cb=aac4ae8da83d9ce796a0fd20e2320659)
-
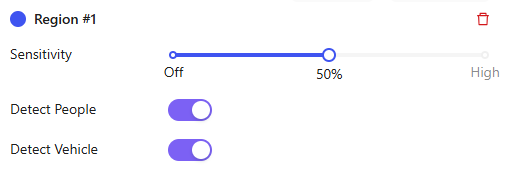
In Region #1, configure the following settings:
-
In Sensitivity, use the slider to adjust how sensitive motion detection is for the selected region.
-
Detect People and Detect Vehicles are toggled ON by default. Toggle one or both analytics OFF to disable these options.
-
-
Complete one of the following options:
-
Repeat the steps above to create another region.
-
Complete the steps below to create a detection line.
-
Select Save at the top of the screen.
-
Create a Detection Line
You can create up to 4 detection lines per camera and a total of 8 lines and regions per camera.
-
Log in to VirtualKeypad.com and enter your User Code.
-
In the menu, select Video.
-
Select the VUE camera you want to create a line for.
-
Select the

-
At Regions & Analytics, select + Line. A line with orange arrows appears in the middle of the camera view screen.
-
Select the line, then drag it across the camera view to place it in the desired location. Select and move the white circles on the ends of the line to manipulate it.
.png.jpg?cb=1561eba8322f8ee3a8780403a52f9321)
-
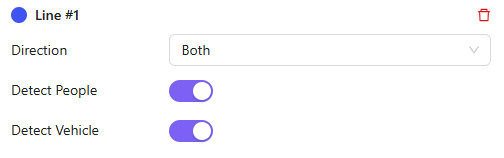
In Line #1, configure the following settings:
-
In Direction, select one of the following directions to monitor if a person or vehicle moves in a direction that crosses the detection line:
-
Enter—Motion has to cross the line in the direction of the arrow.
-
Exit—Motion has to cross the line in the direction of the arrow.
-
Both—Motion can cross the line in either direction.
-
-
Detect People and Detect Vehicles are toggled ON by default. Toggle one or both analytics OFF to disable these options.
-
-
Complete one of the following options:
-
Repeat the steps above to create another line.
-
Select Save at the top of the screen.
-
View Camera Live Feed
-
Log in to VirtualKeypad.com and enter your User Code.
-
In the menu, select Video.
-
Select the VUE camera you want to view. The camera camera’s live view displays with the date and time visible in the top-right corner. Refer to the information below to complete the following actions:
Note: Some options may not appear if they are disabled in camera settings. Refer to Configure Camera Settings for more information.
Turn On/Turn Off White Light
Select the ![]()
Select the ![]()
Turn On/Turn Off Red and Blue Lights
Select the ![]()
Select the ![]()
Mute/Unmute Mic
Select the ![]()
Select the ![]()
Mute/Unmute Speaker
Select the ![]()
Select the ![]()
View Video Events
Select the ![]()

Select Go Live in the top-left corner to return to live view.
Refer to the table below for more information about motion and analytics events.
|
Event Type |
Description |
|---|---|
|
Motion Detection Events |
These are recorded when a region is configured in camera settings but video analytics (person or vehicle) are not assigned to that region. Every time motion is detected, the clip is recorded and stored in Events on Virtual Keypad. |
|
Analytic Detection Events (Person or Vehicle) |
These are recorded when a region or line is configured, and video analytics are assigned in camera settings. For example, when a region is configured to detect vehicles. Every time a person or vehicle is detected within the defined region or crosses the defined line, the clip is recorded and displays in Events on Virtual Keypad. |
Take a Snapshot
Select the ![]()
Display Camera View in Fullscreen
Select the ![]()